Pages
Section for adding pages with a unique design on the Platon Platform
Pages
The Pages module of the Platon platform is used to structure or create planned web pages. The page being formed here can be customized according to user requirements.
Creating a Page
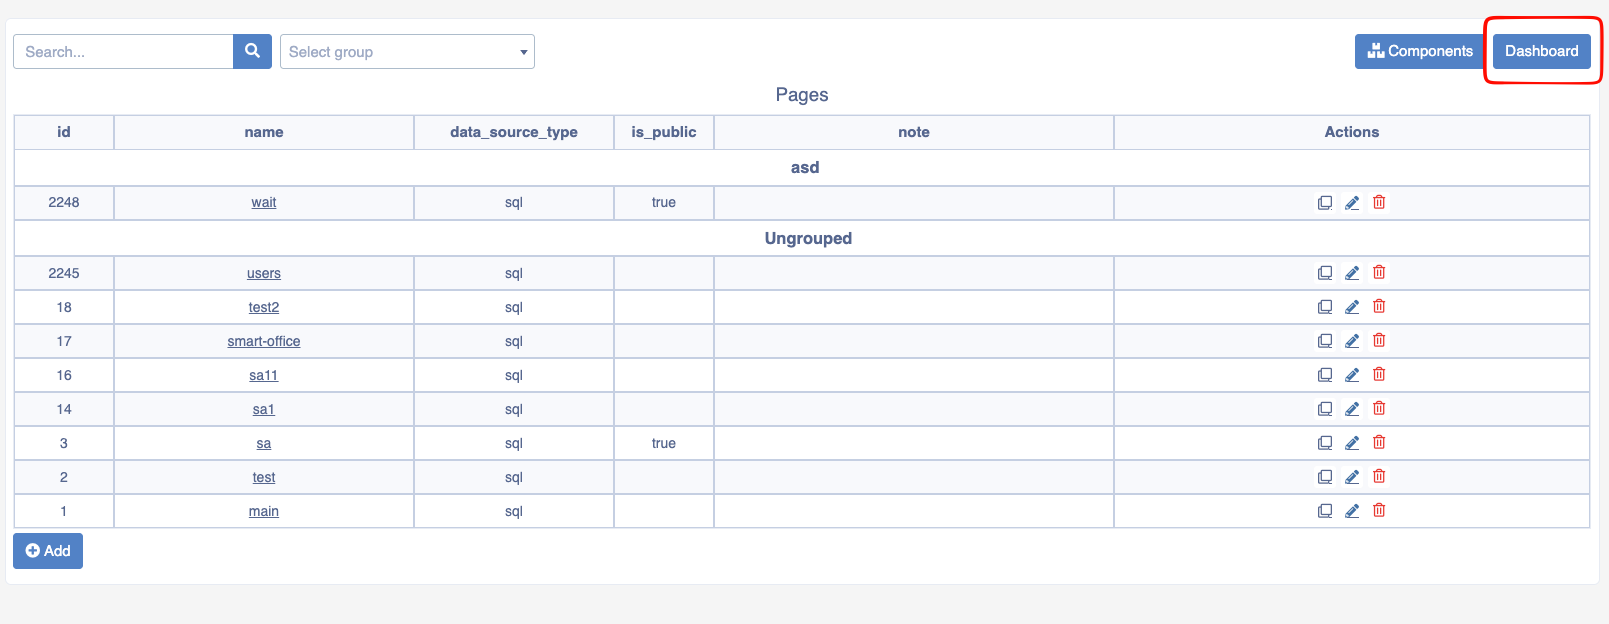
To create a page, go to the Pages section of the Platon platform's navigation panel. This page displays a list of pages previously created on the Platon platform.
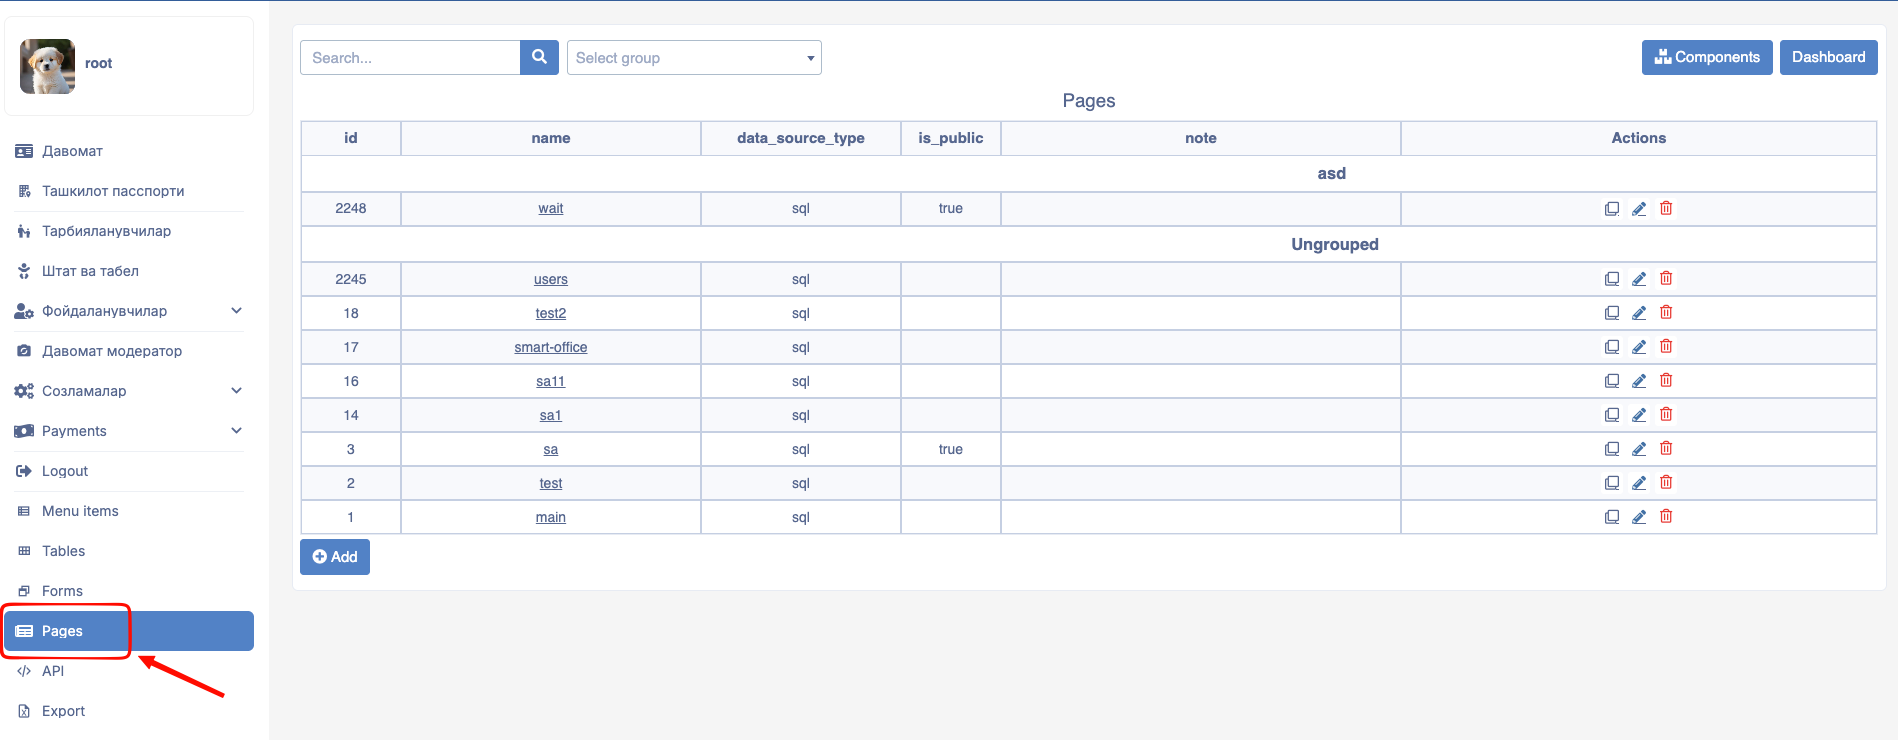
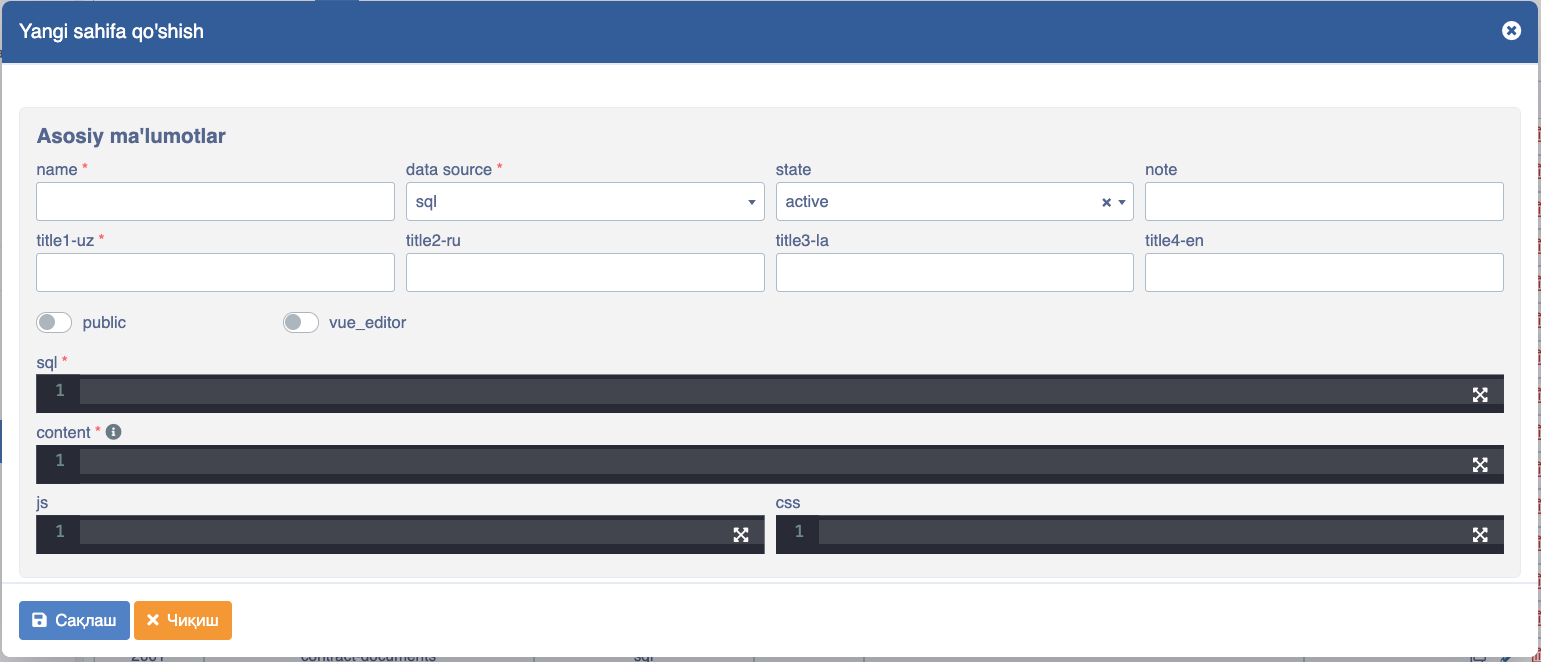
Click the Add button located at the bottom of this page to open the following form:
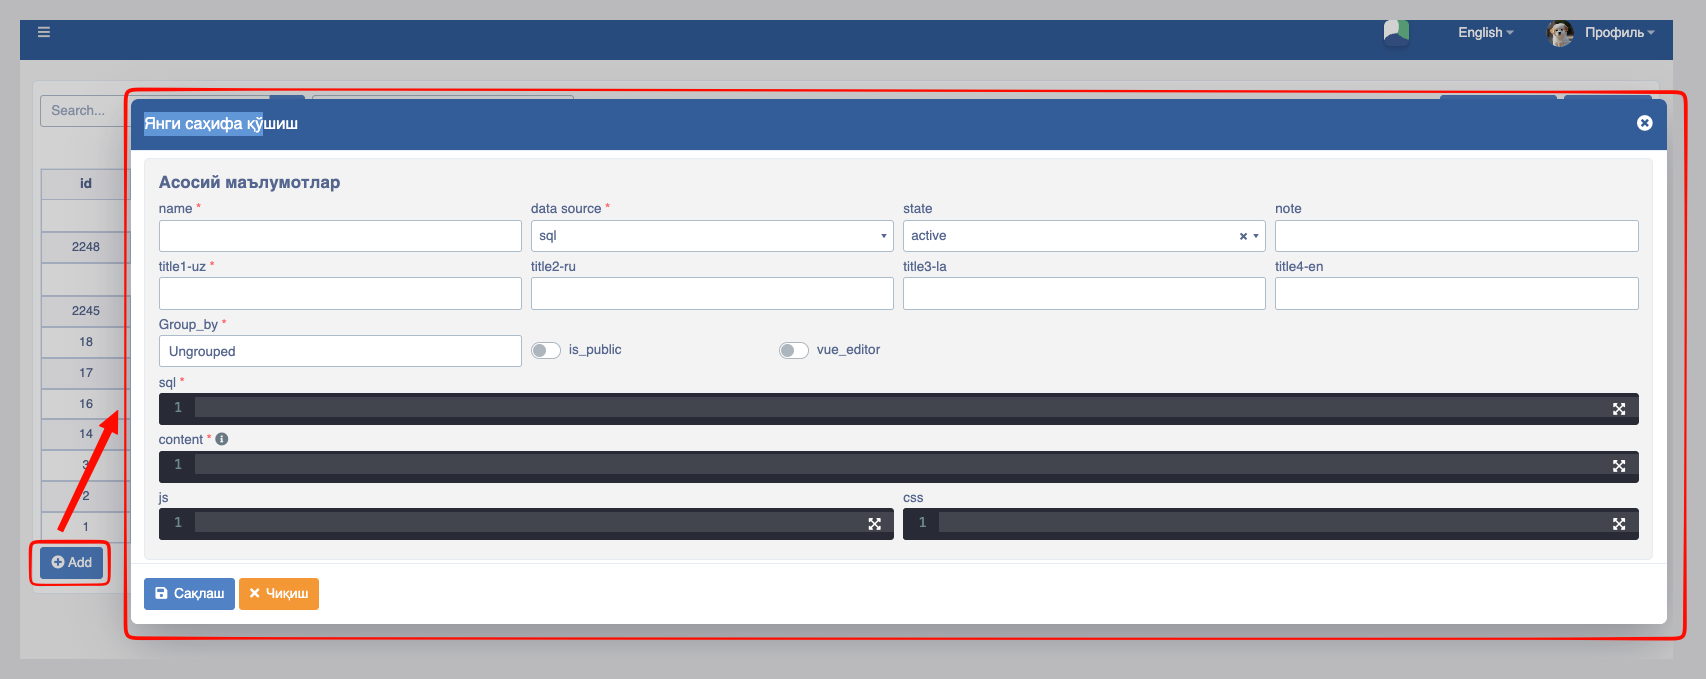
This window consists of the following fields:
- name: The name of the page (also used as the URL to open the page);
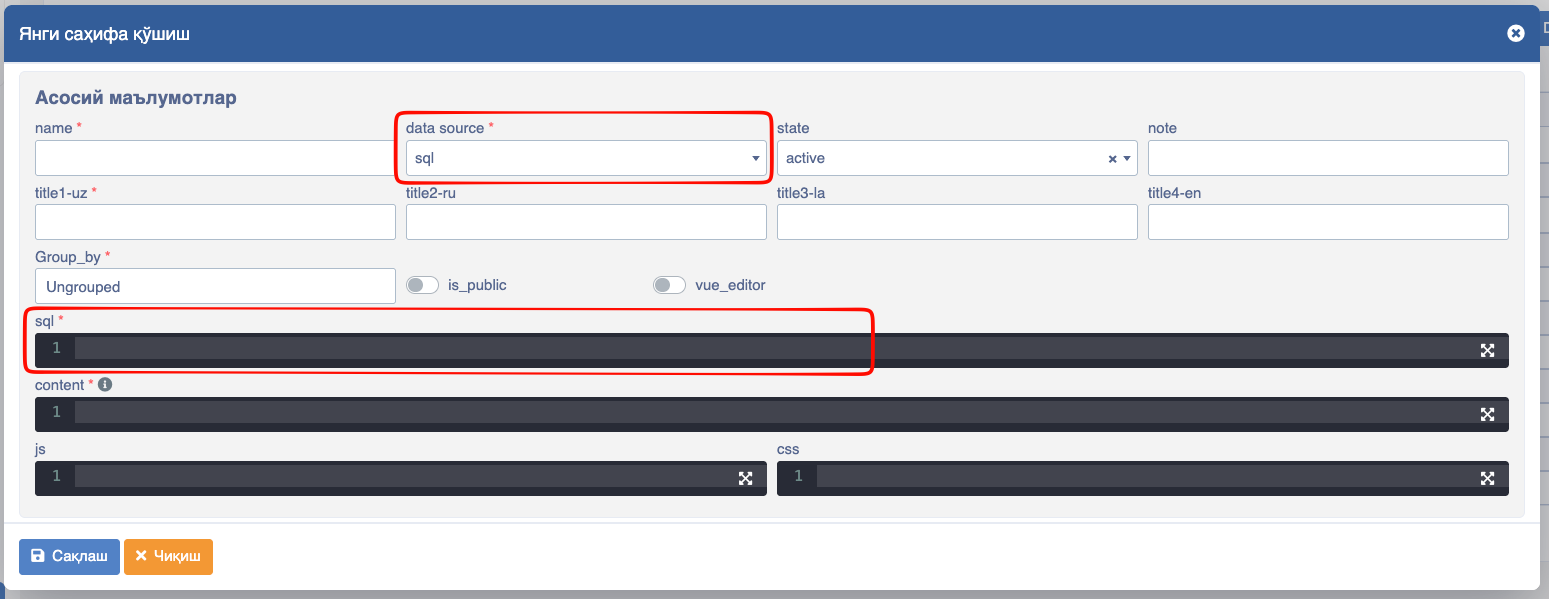
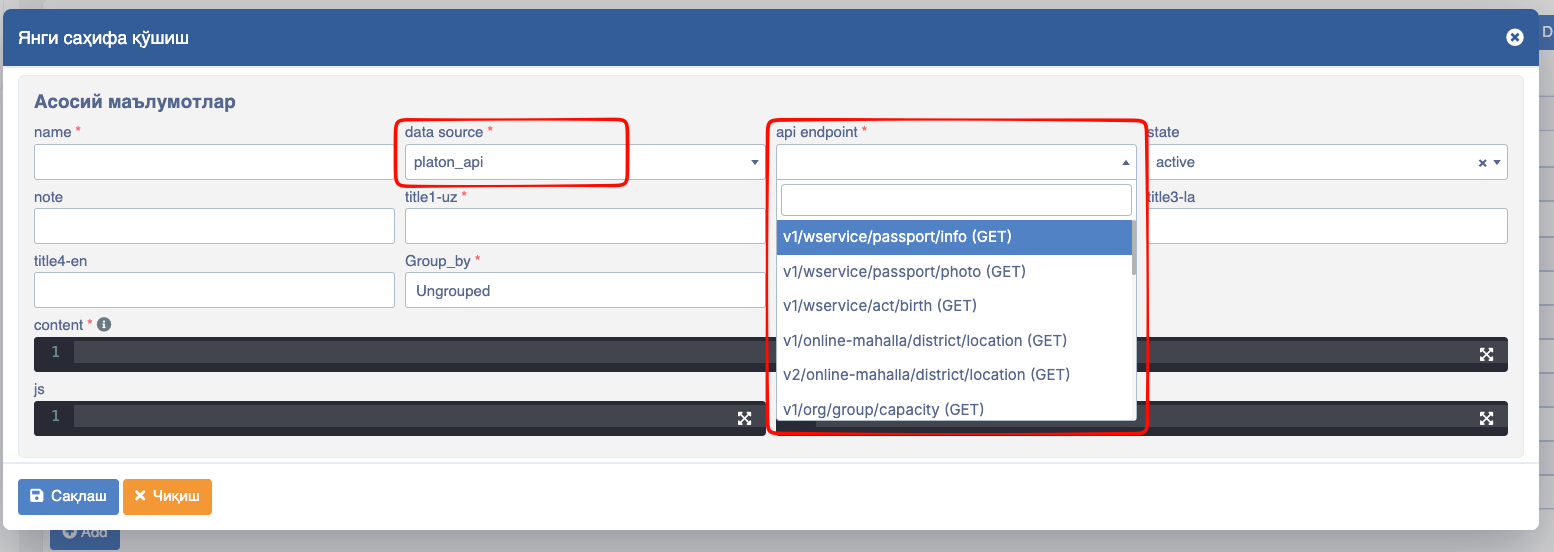
pageName- data_source: Determines which instrument (
sqlorplaton_api) is used to fetch the data displayed on the page from the database. When sql is selected in the data_source field, the following window appears:
When platon_api is selected in the data_source field, the following window appears:
- state: Used to set the status of the page (
active,hidden, orarchived); - note: Designed for writing comments or reminders for yourself.
- title 1,2,3,4: The title of the page (1 - Uzbek Cyrillic, 2 - Russian, 3 - Uzbek Latin, 4 - English);
- is_public: When this switch is enabled, internet users who have not authorized (logged in) will be able to view the created page;
- vue_editor: When this switch is enabled, the following vue_code area opens, combining
html,css, andjscode:
- sql: Designed for writing SQL queries;
Example:
[
    {
        "alias": "name",
        "sql_result_type": "list",
        "sql": "select * from table_name"
    }
]- content - HTML components are written in this field;
Example:
<div>
  <p v-for="item in data">
    {{item.name1}}
  </p>
</div>- js - This field is designed for writing Javascript (Vue 2 Options API) code;
Example:
{
  data(){
    return { data: [] }
  },

  mounted() {
    this.$api.get('test/test_endpint').then(res => {
      this.data = res.data.data;
    });
  }
}- Translations -
$l
We can use data entered the translations section within Platon pages. If used within HTML tags:
<p class='title'>
    {{ $l('test_lang' , 'I am a Platon developer')}}
</p>
If used within the JS section:
this.$l('test_lang', 'I am a Platon developer')- $router , params Retrieving data/params from the link in Platon pages:
data(){
    return { params: this.$route.query }
},
mounted() {
    console.log(this.params.search)
    // in this case, it retrieves the search value from params
}- $sendEvent. This method is used to send data to Platon components. We catch it using
onEvent.
For example:
this.$sendEvent('change', 3)- $onEvent Through this method, we catch data sent from a Platon page via
sendEvent.
this.$onEvent('change' , this.event)
    methods:{
        event(e){
        console.log(e)
    }
}- css - This field is designed for writing CSS code;
Example:
class_name {
    height: 100%;
    line-height: 1;
    background: #fafafa;
    font-size: 14px;
    color: red;
    font-weight: 500;
    font-family: Montserrat;
}
Creating a Vue Component
Platon also provides the ability to work by separating logic into components, similar to Vue.js. To do this, simply click the button shown below in the page creation section:
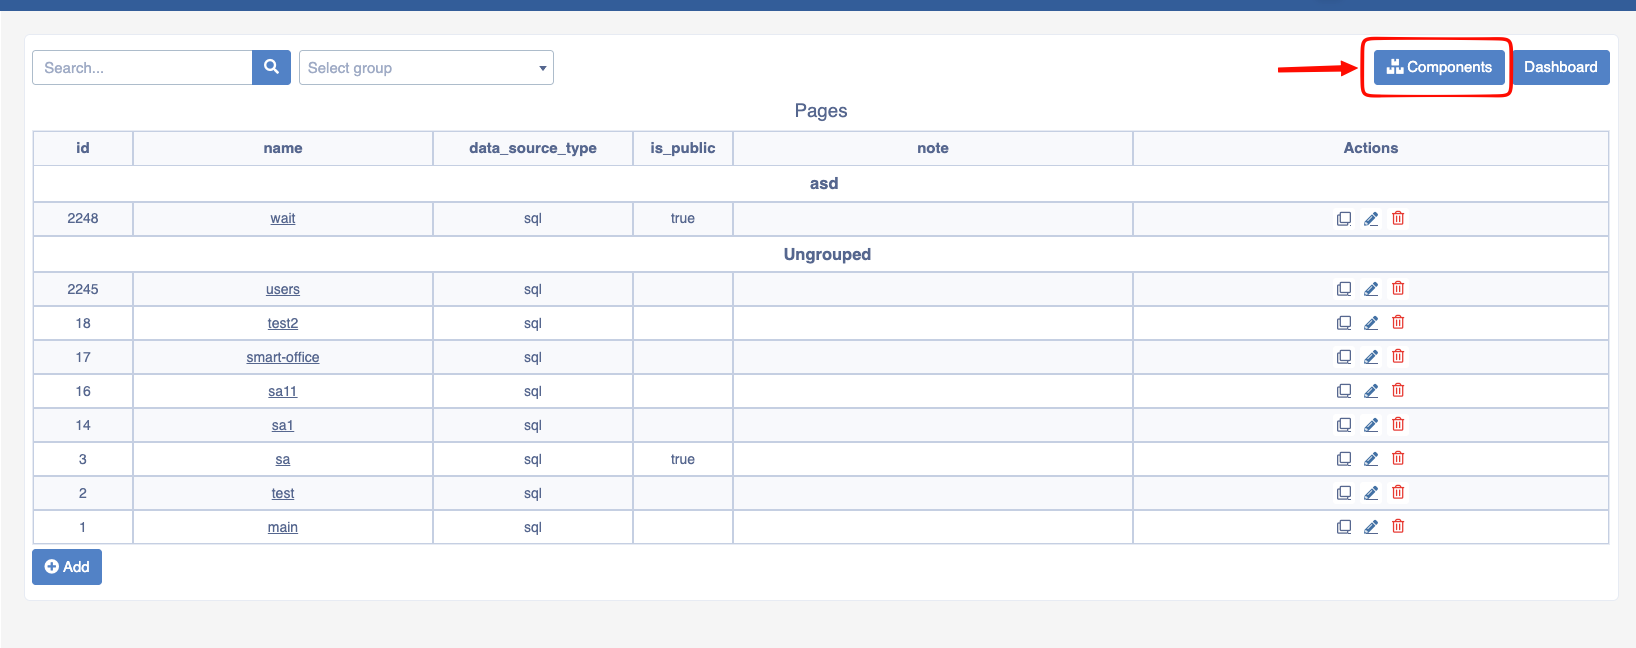
Here we can see the list of components:

If the add button is clicked, the following window opens:
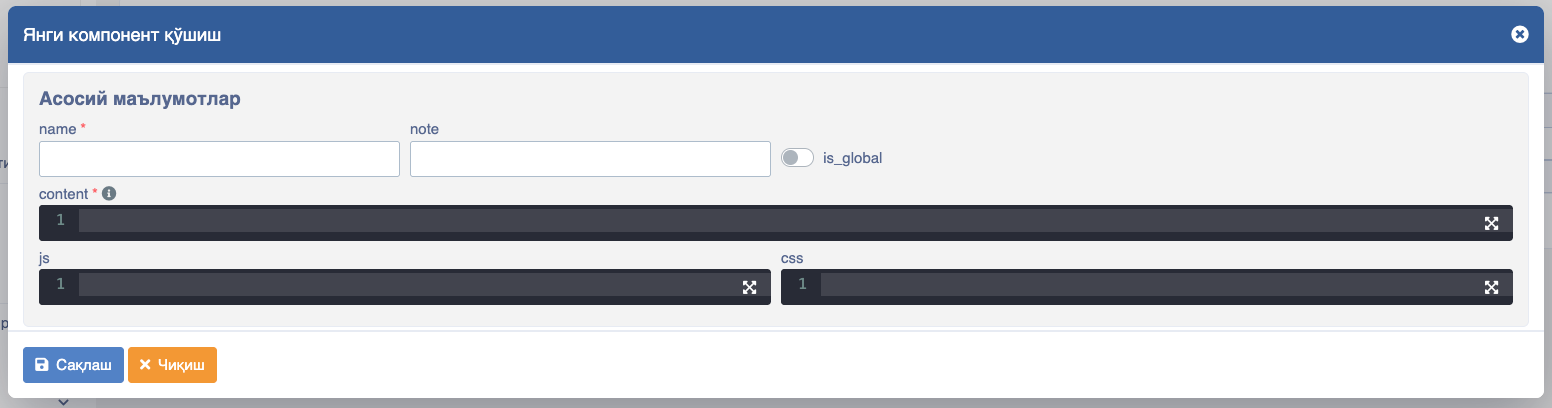
In this window:
- Name - Component name
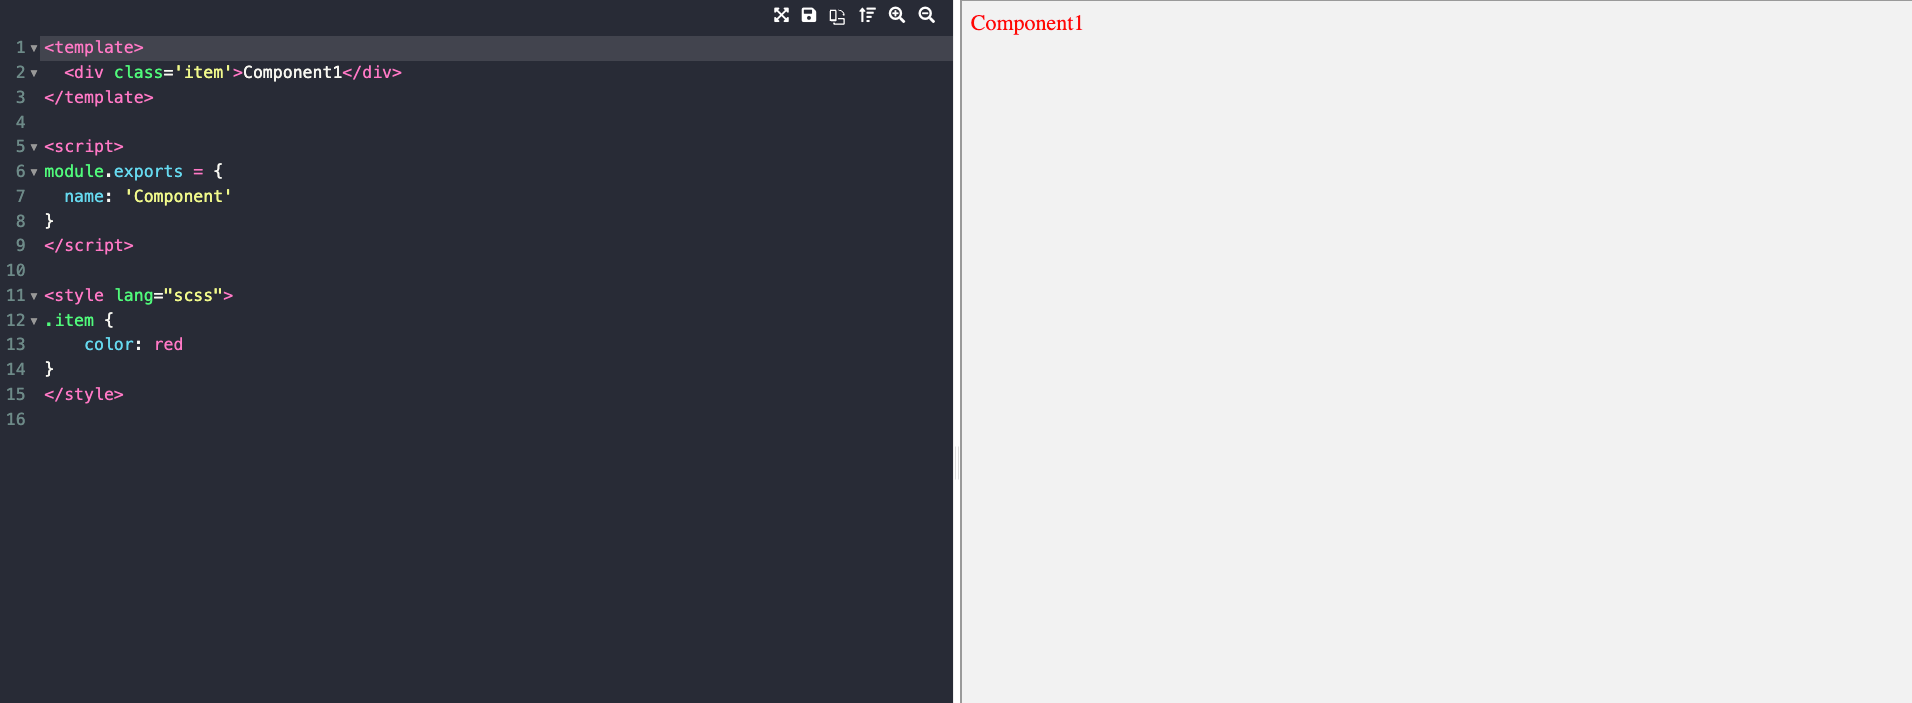
- Сontent - VUE template (like in pages)
- JS - Vue js 2 optional API
- CSS - CSS styles are written here
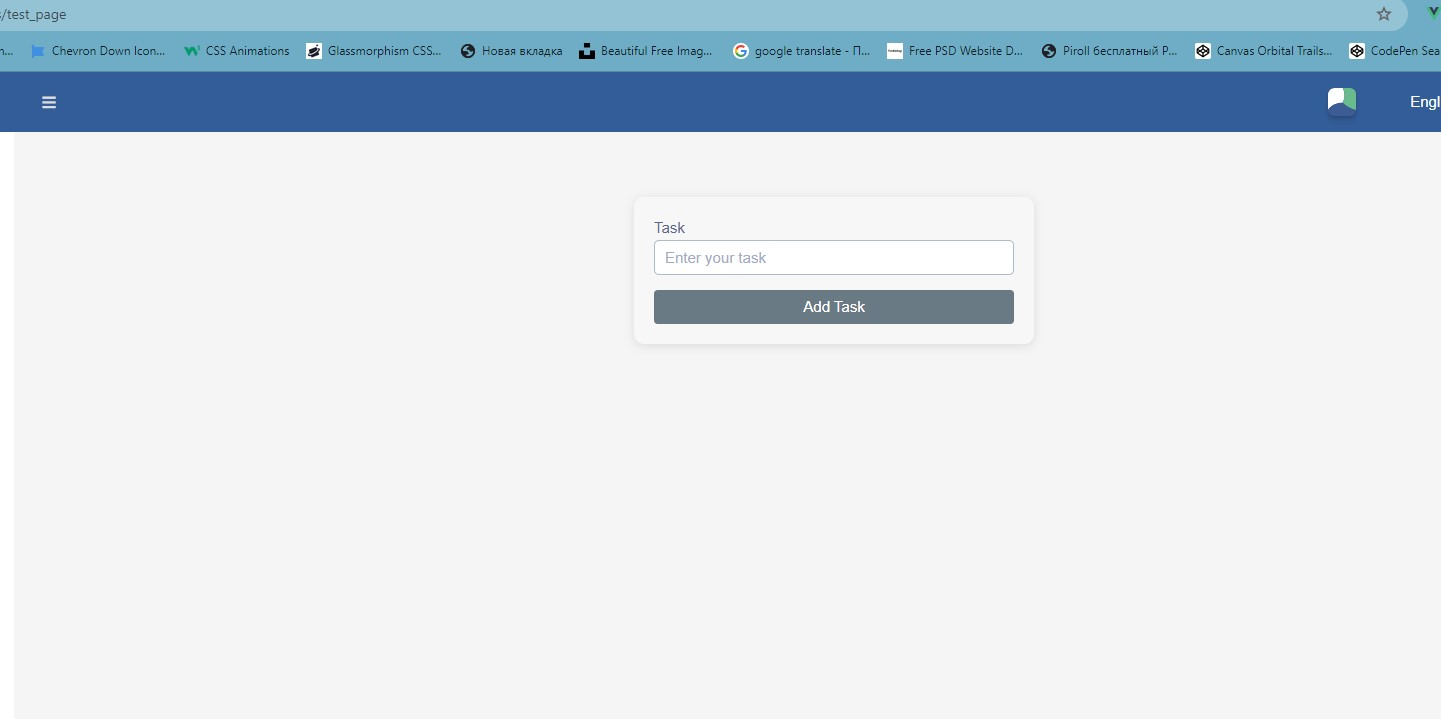
Example of creating a page without the Vue editor enabled:
- SQL SQL Since SQL is always required here but we don't need it right now, we entered an empty array symbol [].
- Content HTML (VUE template) is written on this page:
<templeate>
  <div id="app">
  <b-container class="custom-container">
    <b-form @submit.prevent="addTask">
      <b-form-group label="Task" label-for="task-input">
        <b-form-input
          id="task-input"
          v-model="newTask"
          placeholder="Enter your task"
          class="custom-input"
        ></b-form-input>
      </b-form-group>
      <b-button type="submit" class="custom-btn">Add Task</b-button>
    </b-form>
  </b-container>
</div>
</templeate>- JS VUE JS Options API javascript code is written on this page:
{
  data() {
   return {
      newTask: '',
      tasks: []
   }
  },
  methods: {
    addTask() {
      if (this.newTask.trim() !== '') {
        this.tasks.push(this.newTask);
        this.newTask = '';
      }
    }
  }
}- CSS CSS code is written on this page:
.custom-container {
     margin-top: 50px;
     max-width: 400px;
     background-color: #f7f7f7;
     padding: 20px;
     border-radius: 10px;
     box-shadow: 0px 2px 10px rgba(0,0,0,0.1);
   }
.custom-btn {
     width: 100%;
     background-color: #5cb85c;
     border: none;
   }
.custom-input {
     border-radius: 5px;
     padding: 10px;
   }
.todo-list {
     margin-top: 20px;
     list-style-type: none;
     padding-left: 0;
   }
.todo-item {
     padding: 10px;
     background-color: #ffffff;
     border-radius: 5px;
     box-shadow: 0 1px 3px rgba(0,0,0,0.1);
     margin-bottom: 10px;
   }
And if we look at the result, the following page appears:
Additional
We can also use other libraries within the pages.
TODO
What is the usage of Dashboard button