Forms
Guide for Forms used for working with data on the Platon platform.
General Information
The main functionality of the Forms section is to construct window interfaces designed for data entry by web page users. Details ->
Section Structure
Creating a Form
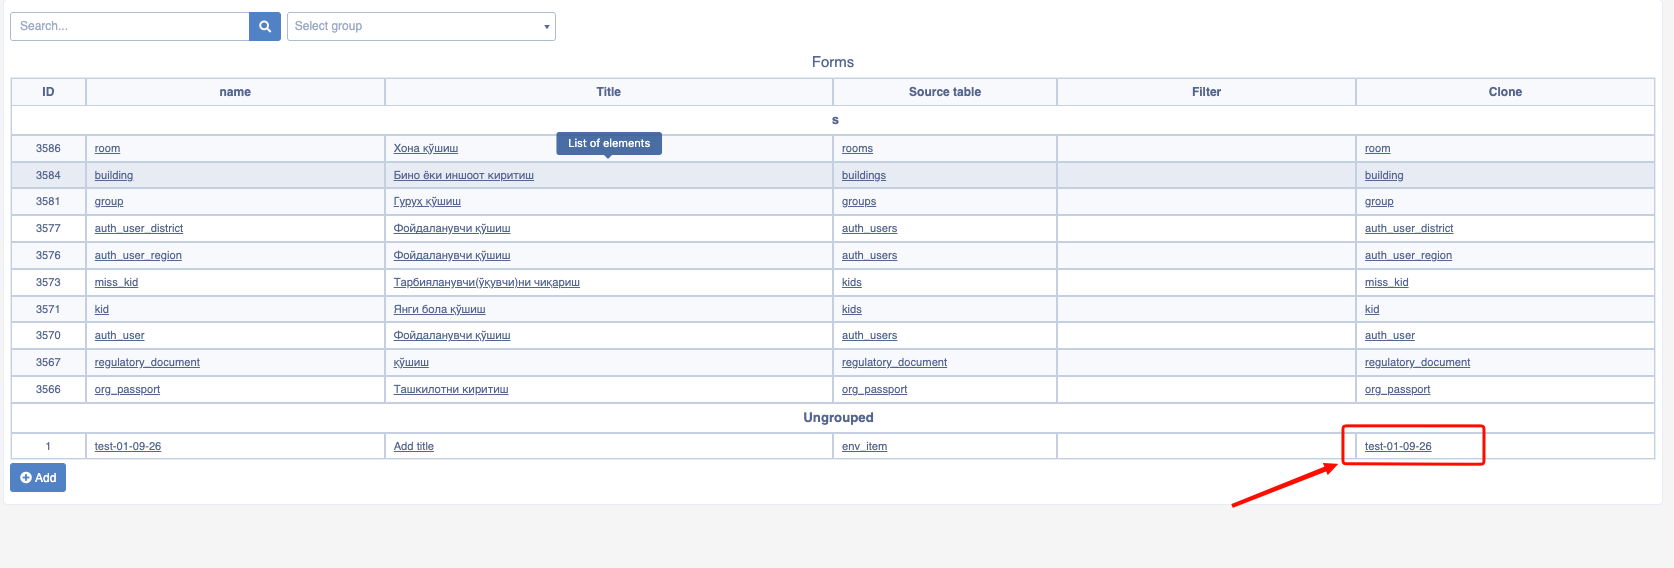
To create a form, navigate to the Forms section of the Platon platform navigation panel. The page that opens will display a list of previously created forms on the Platon platform. Click the Add button located at the bottom of this page, and the following window ("form") will open:
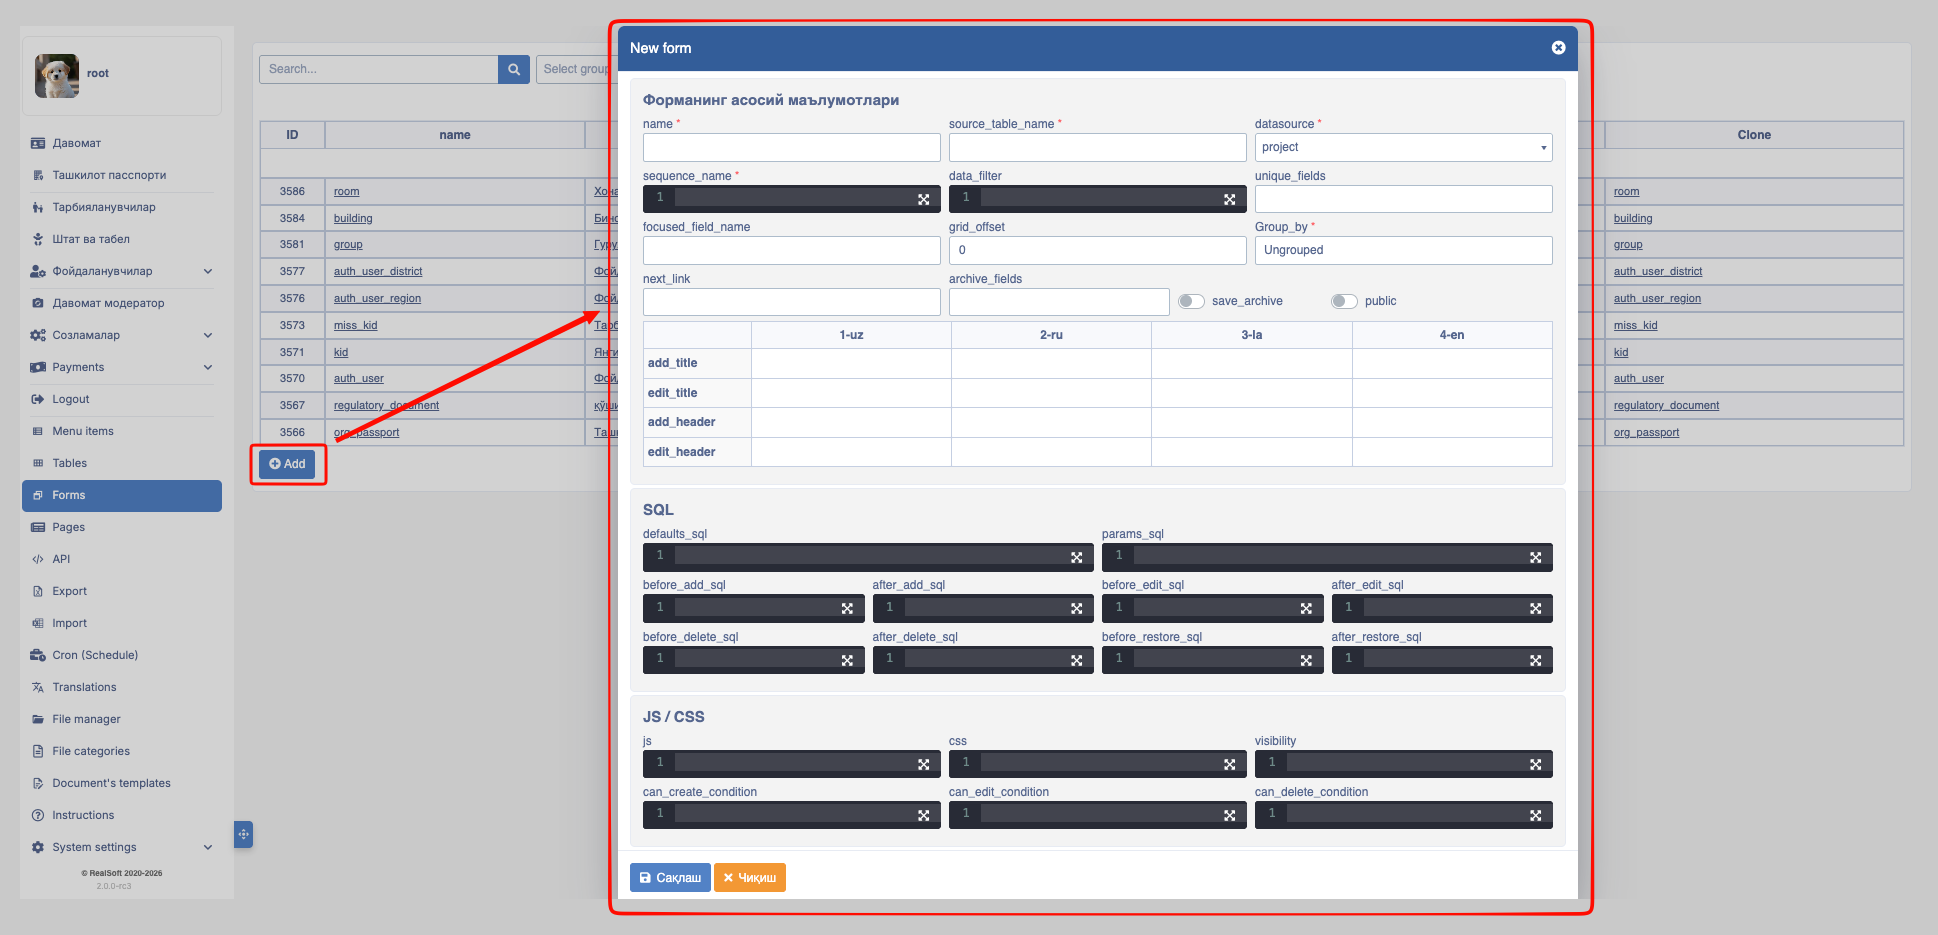
Input types and functions when creating a Form:
- name: Accepts values in text format and serves as the name of the form. It must not contain spaces.
- source_table_name: You must specify which table in the database the data filled in the form will be written to.
- datasource: Which database the form should save data to (
PROJECT,PLATON,CLICKHOUSE). - sequence_name: Specify which sequence should be used to insert into the database table.
- data_filter: Used to apply filters to the data in the form;
data_type = #data_type
type_id = 1- unique_fields: This functional ensures that the
columnin the database remains unique;
username- focused_field_name: Determines which column should be in focus when entering the form. The
data_fieldvalue of form elements is written here, and only1element can be in focus;
name ✅
name,username ❌- grid_offset: Serves to provide spacing on both sides of the form;
- group_by: Indicates which group the form belongs to;
- next_link: Used to write the address of the page that should open after the form is filled and the save button is clicked. To close the modal or blank window after saving, the special
urlnamedbackis used; - public: Allows access to the form even without Authorization. In public forms,
$useruserParams cannot be used; - add_title: Used to write the title of this form's web page address (https) section;
- edit_title: Used to name the editing title;
- add_header: Used to write the header of this form;
- edit_header: Used to edit the header of this form;
- default_sql: Values that must always be saved when the form saves should be specified in this section;
select #type_id as type_id, -- when the form opens, the type_id from params must also be saved to the base
       #parent_id as parent_id,
1 as category_id- params_sql: To store variables from params. This SQL is for select only;
SELECT $user.locale as locale,
       $user.id as moderator_user_id,
       to_char(now(),'yyyy-mm-dd hh24:mm') as moderator_view_date ,
'ACTIVE' as status_moderator- before_add_sql: SQL executed before the form adds new data.
updateandinsertqueries can be written here. Multiple queries can be separated by;. Only form element values can be retrieved via the@{data_field}symbol;
update ob_ads_moderators m
set state=0
from ob_ads ads
where ads.id = #id
and m.ads_id = ads.id
and ads.status != @status::ads_status;

insert into ob_ads_moderators(created_by,
                              ads_id,
                              moderator_conclusion_id,
                              moderator_conclusion_note,
                              moderator_view_date,
                              moderator_user_id,
                              moderator_status)
select $user.id::bigint,
       id,
       (attributes ->> 'moderator_conclusion_id')::bigint,
       (attributes ->> 'moderator_conclusion_note')::varchar,
       now(),
       $user.id::bigint,
       @status::ads_status
from ob_ads
where id = #id
and status != @status::ads_status;- after_add_sql: SQL executed after the form adds new data. Working principle is like
before_add_sql; - before_edit_sql: SQL executed before the data in the form is updated. Working principle is like
before_add_sql; - after_add_sql: SQL executed after the data in the form is updated. Working principle is like
before_add_sql; - Js: Custom js codes over form elements;
- css: For writing custom CSS codes for form elements;
- visibility: Form permissions determine which users can see the form;
$user.has_perm('moderator.user') && $user.has_perm('hy.admin')- can_create_condition: Determines which users can save data via the form;
$user.has_perm('hy.admin') || $user.has_perm('platon.admin')- can_edit_condition: Determines which users can modify data via the form. Working principle is like
can_create_condition; - can_delete_condition: Determines which users can delete data via the form. Working principle is like
can_create_condition;
Form Elements
After the form is created, selecting a value in the Clone column for a row using Command (Window) + mouse click opens the following window.
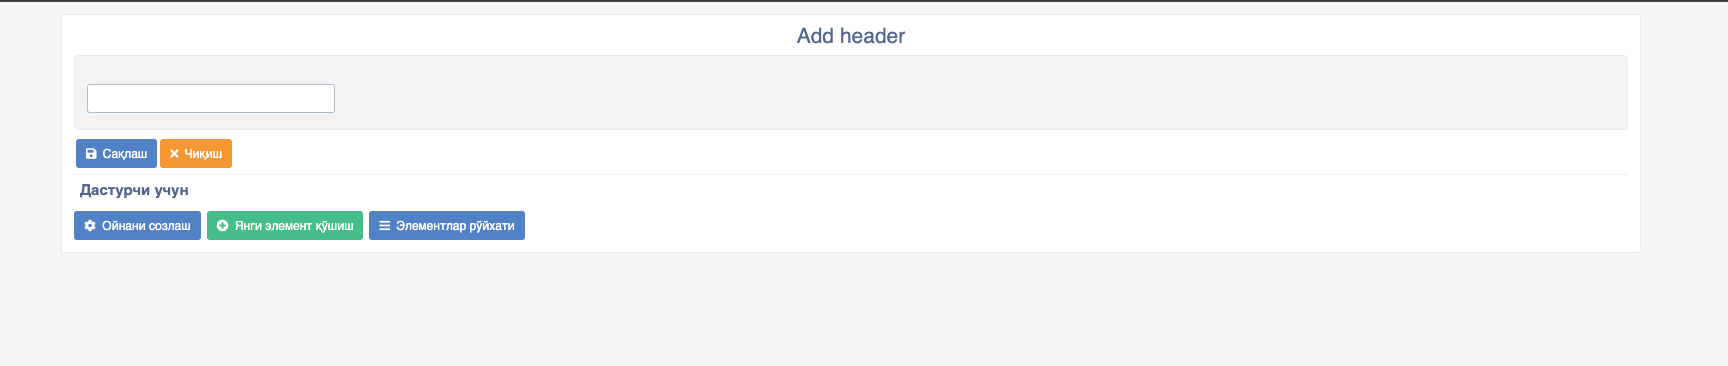
The following buttons are available in this window:
- For Users:
- Save: Clicking this button saves the data entered into the form.
- Exit: Clicking this button exits the form view.
- For Developers:
- Configure Window: Used to make changes to the form configuration.
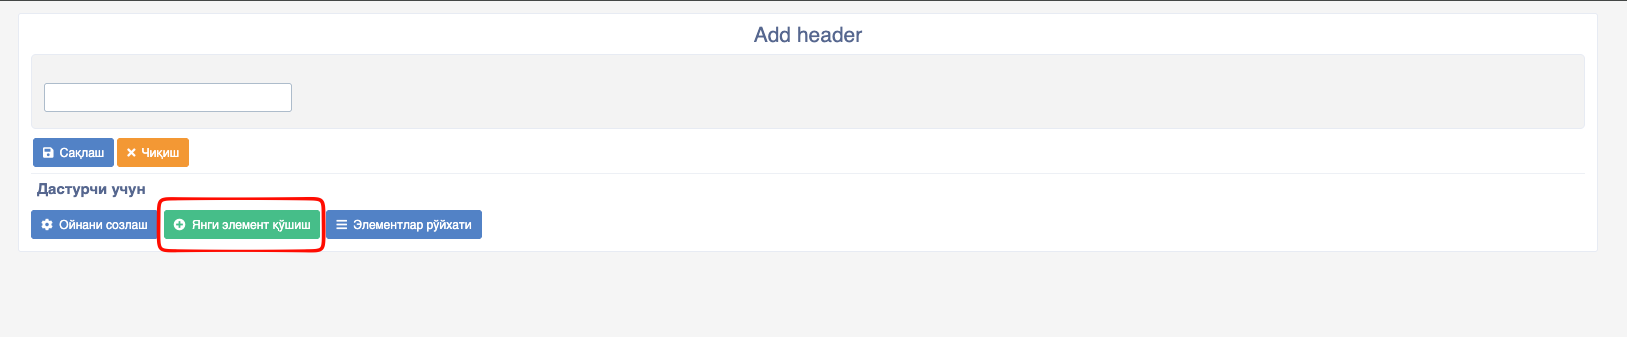
- Add New Element: Used to add new elements (cells designed for data entry by the user) to the form.
- Elements List: Clicking this button allows you to see a list of all elements on the form page.
Adding a New Element
This button is used to add new elements (cells designed for data entry by the user) to the form. When clicked, the following window opens:
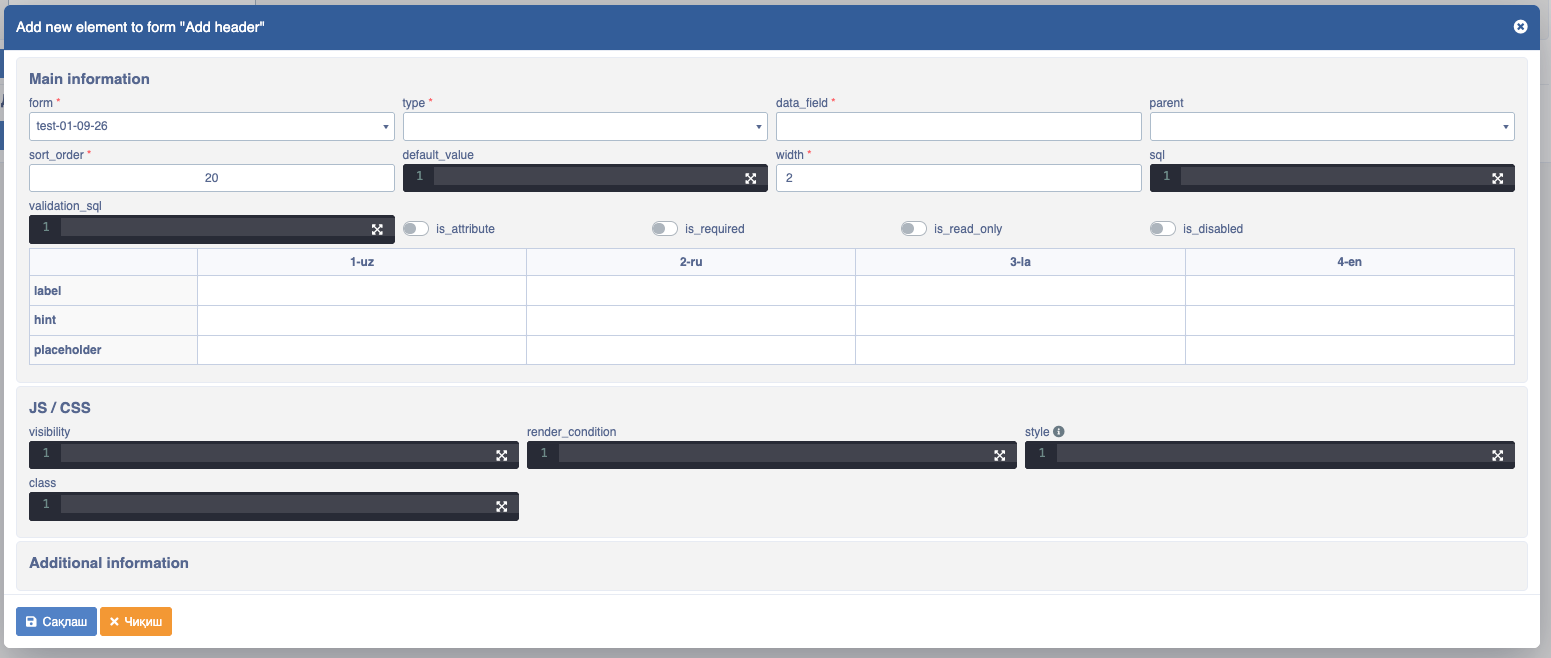
The window consists of the following fields:
form: The name of the form (also, the form will be located in the URL with this name);type: The function or type of the element, consisting of the following:- a) fieldset - Creates a new field area for arranging elements;
- b) text - Creates an input for entering text;
- c) raw_json - Used only for accepting JSON type data;
- d) number - Creates an input for entering numbers (natural numbers);
- e) file - Creates an input for accepting files;
- f) image - Creates an input for accepting images;
- g) button - Creates a button to send various requests;
- h) date - Creates an input for accepting dates;
- i) select - Creates an input allowing the selection of one item from multiple data options;
- j) time - Creates an input for accepting time;
- k) multiselect - Creates an input allowing the selection of multiple data items;
- l) checkbox - Creates an element that returns boolean type data;
- m) textarea - Creates an input for entering large amounts of text (for descriptions);
- p) code - Allows saving code in various programming languages (
js,html,css,sql);
- p) code - Allows saving code in various programming languages (
- r) html - Through this, you can send requests to any API and create any design appearance;
- s) geo - Allows entering geolocation by type (map_center, map_zoom). The active map for selection is specified in the
active_mapfield; - t) geo polygon - Allows entering multiple geolocations by type (map_center, map_zoom, is). The active map for selection is specified in the
active_mapfield. Additionally, theis_multipleswitch is activated for entering multiple geolocations; - u) simple key-vale - Used to generate unique values;
- v) tab - Used for placing different data in tabs;
- w) tab container - Grouping tab-placed data in a specific view;
- x) markdown editor, monaco_editor, vue_editor, wysiwyg - Content editing;
data_field: Internal name of the column. This internal code name is used in SQL queries;parent: The main element containing other elements;sort_order: The position of the element on the form page (smaller numbers are placed at the beginning, larger numbers at the end);default_value: Used to give a default value for this element during form creation. Values can be obtained conditionally here, etc.;width: The column width is written in this cell;sql: This cell is designed for writing SQL queries;validation_sql: To validate data in the input. Meaning, a condition is written here, and if it does not meet the condition, it will not post. For example:
SELECT
 not EXISTS (SELECT 1 FROM table_name WHERE name = @name)
--Here, if the entered name has been entered before, it returns an error!is_attribute: This switch is used to enter data into theattributescolumn of the database;is_required: Used to prevent saving without entering data into the element cell (i.e., if this switch is on, it is mandatory for the user to enter data);is_read_only: If this switch is on, the user will only be able to read the data in the element;is_disabled: Allows the data entered the input not to be saved to the database;label: Used to write the title of the element cell;hint: Used to write helper text regarding the data to be entered into the element;placeholder: Used for text entry inside the element cell (this text disappears when the user enters data);visibility: Users with the right to view the created field are entered here;render_condition: Decides whether to show or hide other elements depending on whether form elements are entered. If a value is written in the render_condition field, it saves the entered data in the database. Otherwise, it saves a null value in the database;style: Designed for writing CSS code;class: Used to write codes shaping element properties (color and others);
FormJS
Additional
JavaScript ES6 codes are written in the JS part of Platon forms, not Vue.
- beforeSave: This function runs before the data in the form is saved. It is usually used to check data in inputs, validate, and for other various purposes before saving. For example:
this.beforeSave = () => {
    // javascript codes
    // inside this function we can also use fetch apis as we wish. For example:
    // this.$api.get('api-url').then(res=>{})
    return true
}
Attention
If return: false is returned in beforeSave, the data in the form will not be saved.
- afterSave: This function works like beforeSave above, but it runs after the data in the form has been saved.
this.afterSave = (id) => {
    // here we can also write our JavaScript codes.
    // `id` is the ID returned after the form data lands in the database
}- setVal: This method is used to write default data or data in other cases to inputs in the Platon form.
- For example:
$setVal('Data_field' , 'value')
// Data_field: which input should receive the data
// value: the data that needs to be writtentoast: Toasts are Platon's custom Toasts (notifications). There are two types of toasts in Platon (you can also make personal toasts!):
this.errorToast('Warning message')orthis.$platonApp.errorToast('error')- Red warning.this.greenToast('Success message')orthis.$platonApp.greenToast('success')- Green success notification.
$w: Through
$wwe can catch changes in Platon form inputs. For example, if we want to run a function automatically when the username Data_field\ input changes.
const testFunc = () => {
    // standard JavaScript function
}
$w('username', testFunc);$w('username', (val) => {
test(val)
})
function test(a) {
console.log(a)
}- $form.q: Used to get the value of variables in the form link;
let user_id = $form.q('user_id')- $form.params: To use values brought via
params_sqlinside JS;
$form.params.{{variable_name}}- $data: Used to catch the values of elements coming to the form when the form opens for editing;
$data.{{data_field}} // the dataField value of the form element is written;- this.$router.apps[0].navigateTo(): Through this, the currently open form can be replaced with another. For example, if another form needs to be opened right after saving a form, writing this inside the
afterSavefunction will open the other form after saving;
this.$router.apps[0].navigateTo(`forms/checkpone?_target=modal_40`)- Events:
this.$onEvent()vathis.$sendEvent()are functions for exchanging events.this.$sendEvent(): Used to send a change;this.$onEvent(): Used to catch a change;
 this.$sendEvent('SAVE', id)
// here, the fact that the form was saved and its ID are being sent as an event
this.$onEvent('SAVE', saveFunction)

function saveFunction(id) {
    console.log(save)
}

this.$onEvent('SAVE', (el) => {
    saveFunction(el)
})- $option(): You can get the SQL values of elements with type
Selectin the form.
$option('dataField').{variableName}- form element hide va show: Form elements can be shown or hidden via JS depending on a condition;
$('.street_id').hide();
$('.street_id').show();
// here .street_id is the dataField of the form element- $setAttr(): This function is used to set the data that appears for selection when the form element type is select. For example, if selectable values change via integration, data is fetched via API and set using
$setAttr();
$api.get('path')
    .then(res => {
        $setAttr('street_id', 'data', data);
        $setAttr('element dataField',
            'means setting to the data of this element',
            'data array received from api [{},{}]');
})- $form.formElementsWithKey.DataField.{variable name}: Used to change the values of form elements;
$form.formElementsWithKey.sold_amount.maxValue = params.left_amount
$form.formElementsWithKey.final_sum.maxValue = 50000000

function setLanguageFlags() {
    $form.formElementsWithKey['name'].label = $form.params.sale_type + ' ' + $form.formElementsWithKey['name'].label + ' ' + getFlagEmoji('uz') + ':';
    $form.formElementsWithKey['name_copy'].label = $form.params.sale_type + ' ' + $form.formElementsWithKey['name_copy'].label + ' ' + getFlagEmoji('uz') + ':';
    $form.formElementsWithKey['description'].label = $form.params.sale_type + ' ' + $form.formElementsWithKey['description'].label + ' ' + getFlagEmoji('uz') + ':';
    $form.formElementsWithKey['description_copy'].label = $form.params.sale_type + ' ' + $form.formElementsWithKey['description_copy'].label + ' ' + getFlagEmoji('uz') + ':';
    $form.formElementsWithKey['name_ru'].label = $form.params.sale_type + ' ' + $form.formElementsWithKey['name_ru'].label + ' ' + getFlagEmoji('ru') + ':';
    $form.formElementsWithKey['name_ru_copy'].label = $form.params.sale_type + ' ' + $form.formElementsWithKey['name_ru_copy'].label + ' ' + getFlagEmoji('ru') + ':';
    $form.formElementsWithKey['description_ru'].label = $form.params.sale_type + ' ' + $form.formElementsWithKey['description_ru'].label + ' ' + getFlagEmoji('ru') + ':';
    $form.formElementsWithKey['description_ru_copy'].label = $form.params.sale_type + ' ' + $form.formElementsWithKey['description_ru_copy'].label + ' ' + getFlagEmoji('ru') + ':';
}

function getFlagEmoji(countryCode) {
    let codePoints = countryCode.toUpperCase().split('').map(char => 127397 + char.charCodeAt());
    return String.fromCodePoint(...codePoints);
}- this.$user: Through this function, logged-in user information can be obtained.
this.$user.{variableName}- this.$api.method(get,post,put,patch,delete): Special functions for working with APIs;
this.$api.post(`path`, {data})
this.$api.put(`path`, {'Authorization': 'basic'}, {data})
this.$api.get(`path`)
this.$api.delete(`path`)
Information
For other cases, all JavaScript ES6 functions work.